Coreit certificate: troubleshooting
The sign service is reachable (version responds), but the certificate doesn't show up in the list on ePorezi.me. Follow the steps below — the most common cause is that Windows doesn't trust the Coreit Root CA.
This guide is for users of Coreit qualified certificates (issued via PostaCG / similar issuers) when the certificate fails to appear in the list.
1. SafeNet Authentication Client (skip if already installed)
⤓ Download SafeNet Authentication Client 10.9 (Windows x64)
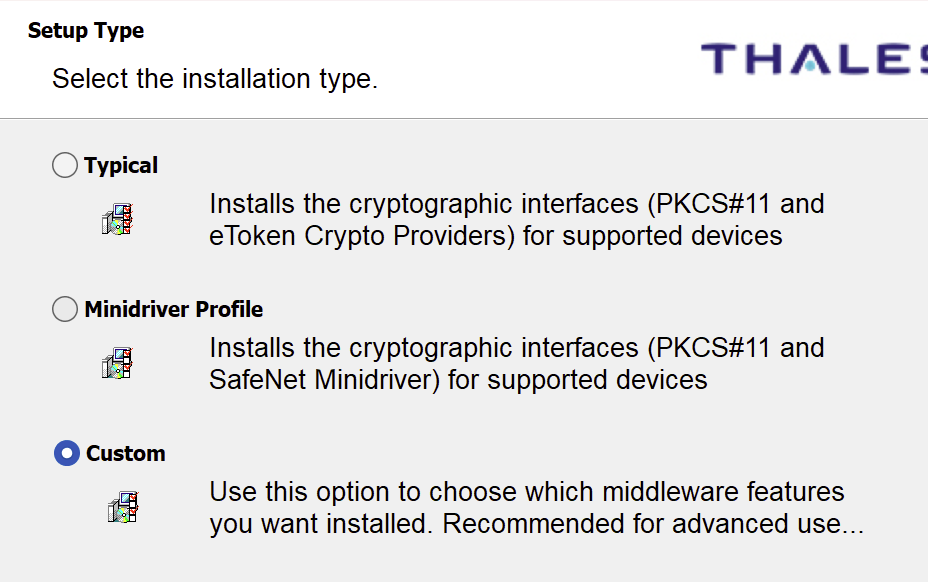
You MUST pick Custom
On the »Setup Type« screen pick Custom — not Typical, not Minidriver Profile. Custom is the only mode that lets you open the component tree on the next screen.
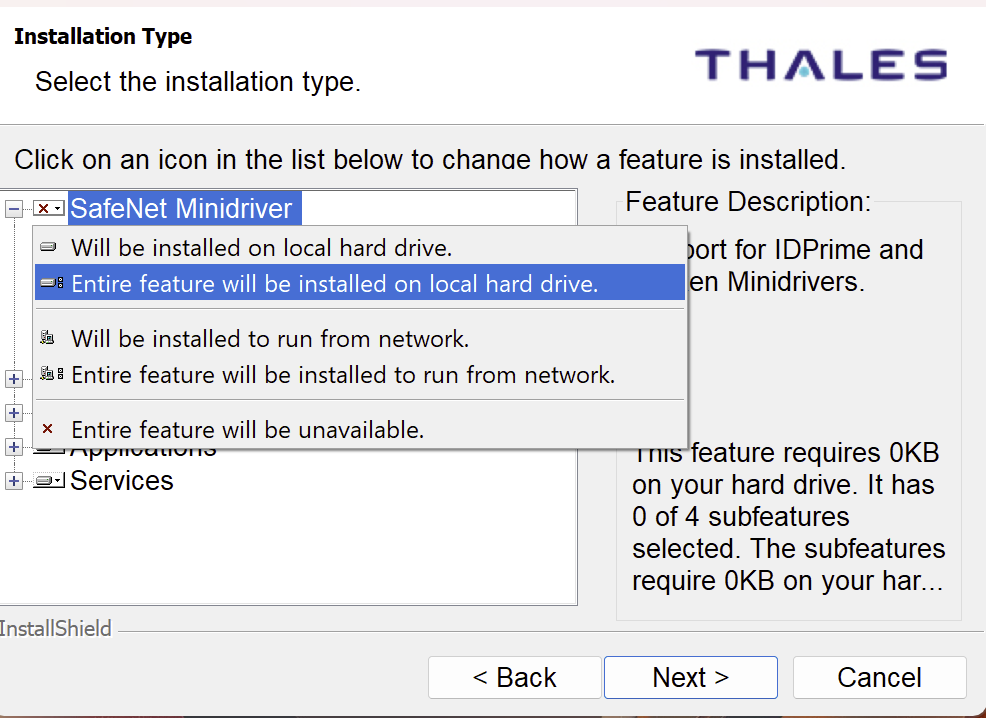
Install EVERY component in EVERY section
On the »Installation Type« screen expand every node in the tree (SafeNet Minidriver, eToken, Applications, Services, and all their sub-items). For each node — root and every sub-item — pick »Entire feature will be installed on local hard drive«. Do not leave a single node with a red X. Anything less and the PKCS#11 layer is incomplete and your certificate may fail to show up in the list.
Finish the installer and reboot if asked.
2. Open SafeNet Authentication Client Tools
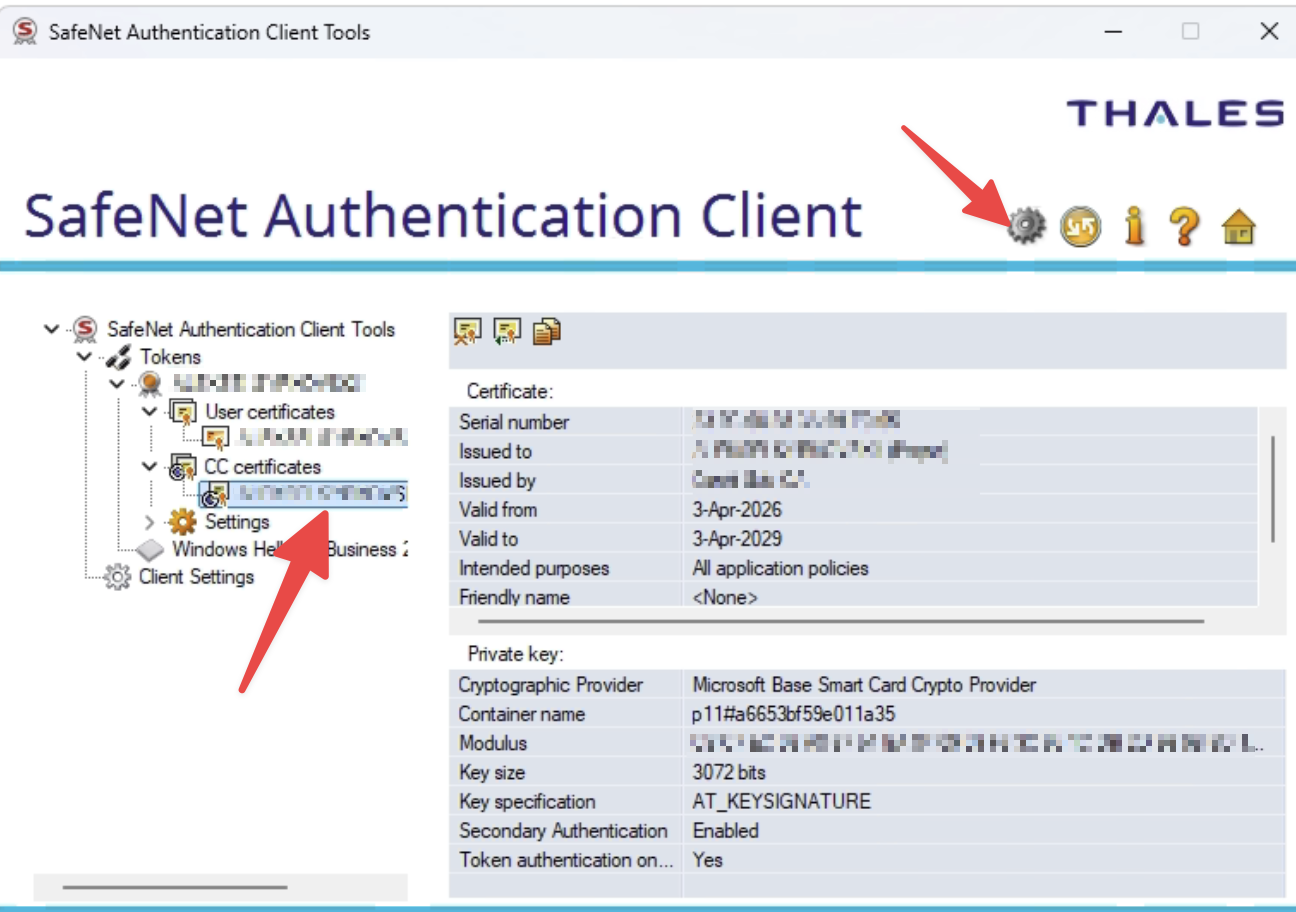
Launch »SafeNet Authentication Client Tools« (Start → SafeNet → SafeNet Authentication Client Tools). Log in to the token (PIN). In the left panel expand Tokens → your token → CC certificates (or User certificates) and select your certificate. Then click the gear icon in the top-right to switch to the advanced view.
3. Open the certification chain
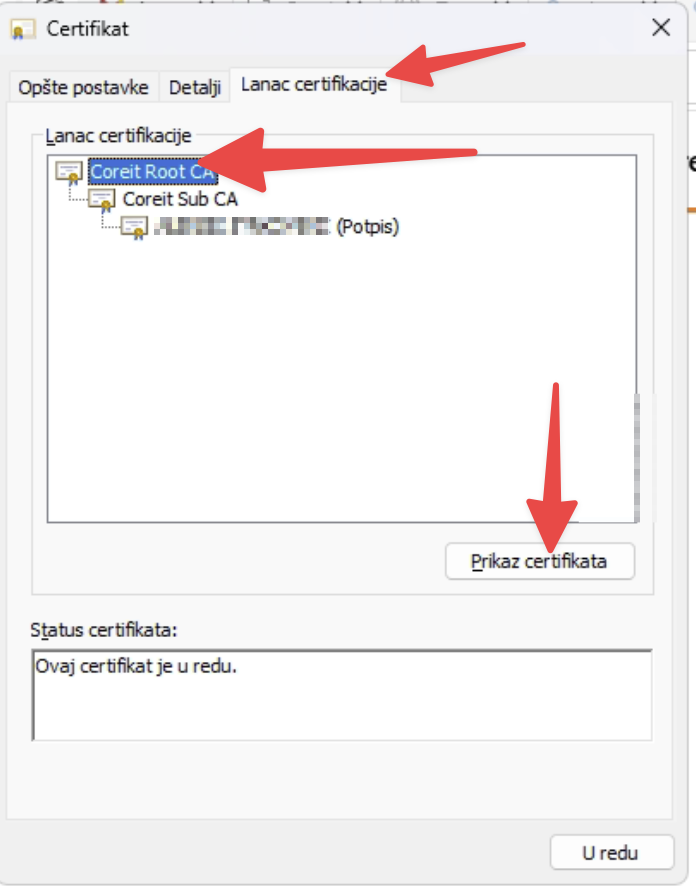
In the certificate details switch to the »Lanac certifikacije« (Certification Chain) tab. You'll see the hierarchy: Coreit Root CA → Coreit Sub CA → your certificate. Select the topmost one — Coreit Root CA — and click »Prikaz certifikata« (View Certificate).
4. Check the root status
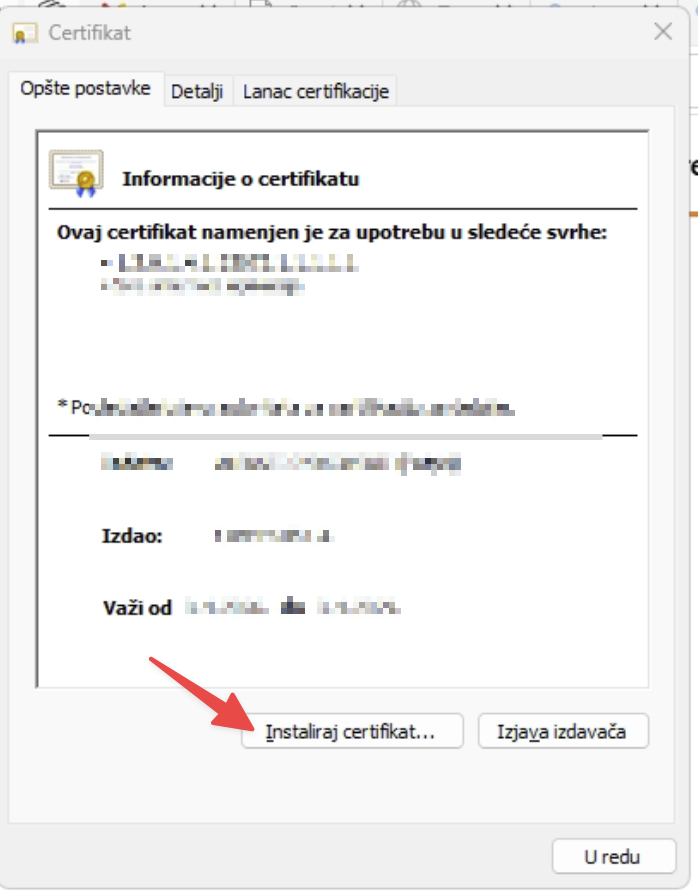
A dialog with the Coreit Root CA details opens. If its status reads »this certificate is not trusted because it is not in the Trusted Root Certification Authorities store« — that's the problem we're fixing. Go to the »Opšte postavke« (General) tab and click »Instaliraj certifikat…« (Install Certificate).
5. Run the import wizard
When the Certificate Import Wizard opens, choose Store Location (Local Machine if you have admin rights — recommended; otherwise Current User). Click Next.
6. Place the root into Trusted Root Certification Authorities
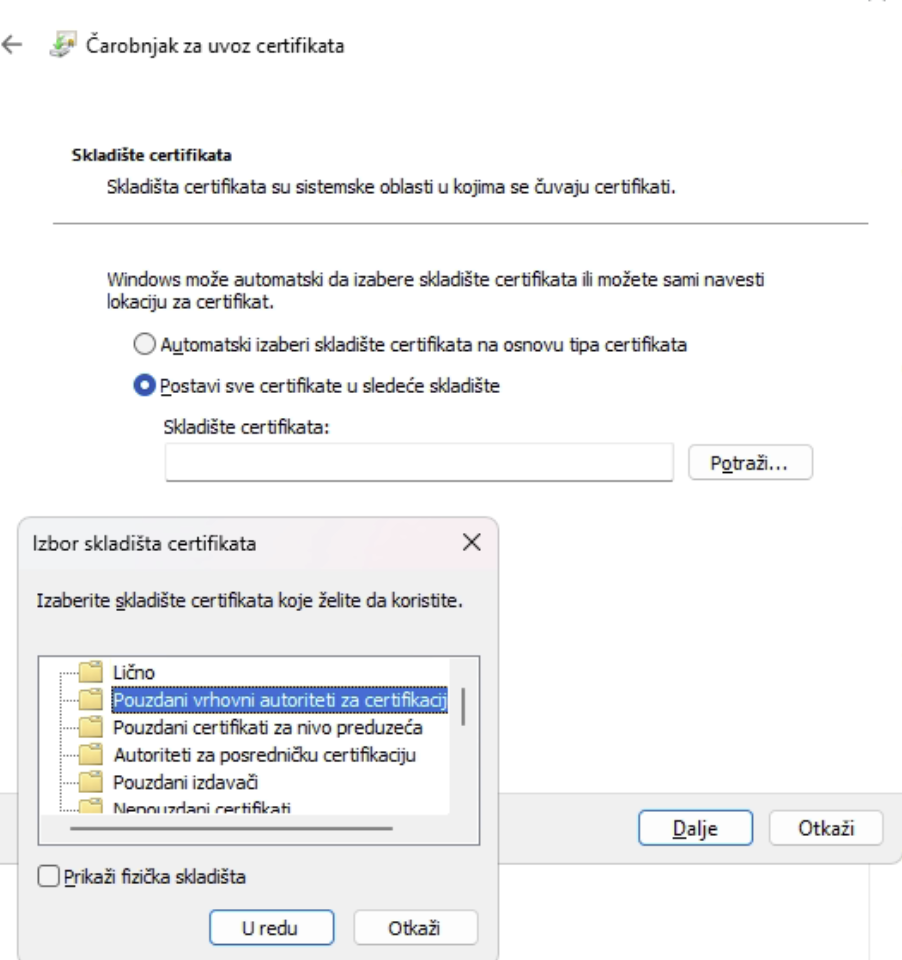
Choose »Place all certificates in the following store«, click »Browse…«, pick »Trusted Root Certification Authorities« and confirm. Finish the wizard (Next → Finish). Windows may ask for confirmation — click Yes.
Done
Go back to the signing page, refresh it, and the certificate should appear in the list. If it still doesn't — check that the token is plugged in, that the SafeNet Authentication Client service is running, and that no VPN is intercepting localhost traffic.